Jump to Recipe
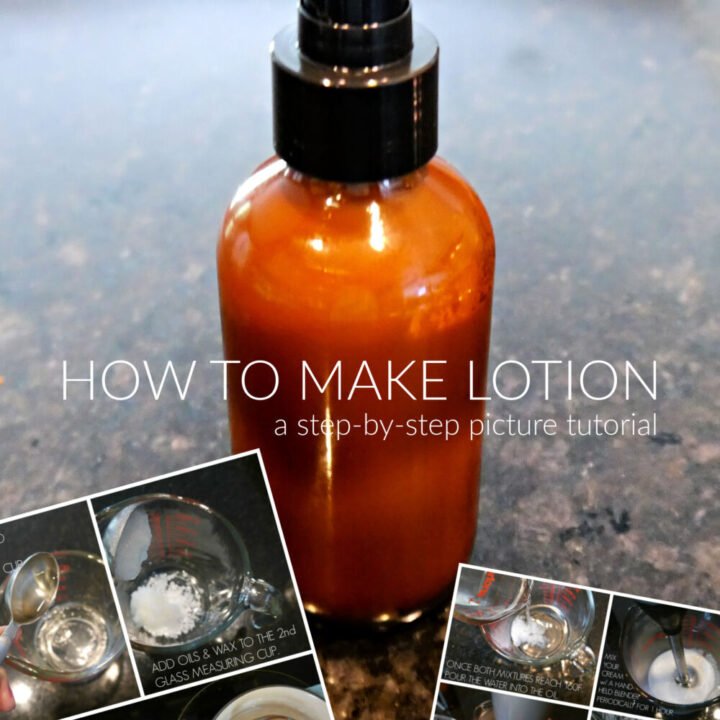
Have you ever wondered if you could make a creamy lotion from home? Wonder no more because in this post I’m going to give you a step by step guide on how to make DIY lotion! It’s actually quite easy and totally natural!
 Disclosure: This post contains affiliate links, meaning, at no additional cost to you, I will earn a small commission if you click through and make a purchase. Learn more
Homemade beauty products can be daunting and knowing where to start can be difficult and overwhelming. Especially when learning how to make lotion. I think many of us are most intrigued by lotion and want to know if it’s possible to make a creamy, fluffy moisturizer ourselves. It can feel uncertain how much organic ingredients are going to cost and then what if your DIY lotion doesn’t come out right?
These are very valid concerns. I’ve written this How to Make Lotion guide with in-depth photos in the hopes that I can give you the confidence to dive in and make a successful and natural DIY lotion at home!
First let me say, making lotion is not out of reach. It’s actually quite easy and affordable. With the right direction, you can easily understand how to make lotion and be able to do it affordably, successfully and naturally!
Creating a DIY lotion is a doable task. However, you must follow the directions exactly and while you may choose whatever oils you’d like, my most important rule is that you use the exact emulsifier I link. Otherwise, I can not guarantee your lotion will turn out successful. I intend to try other brands of emulsifying wax in the future but for now, I can only vouch for Mountain Rose Herb’s emulsifying wax. It is full and fool proof! It’s never failed me.
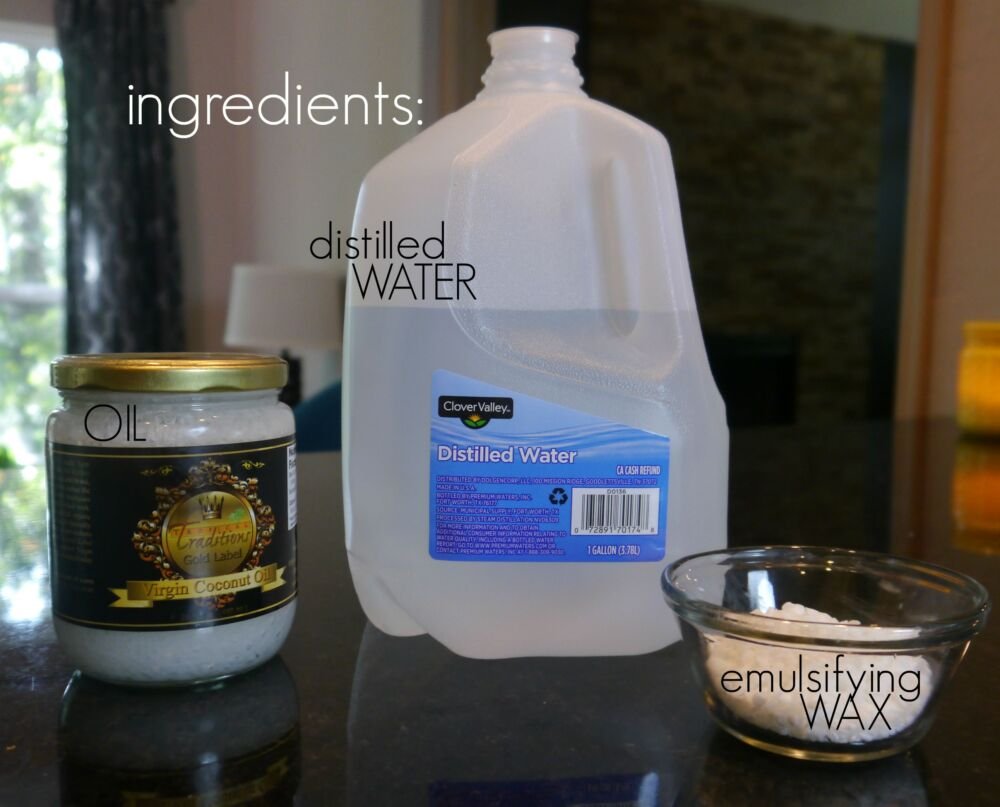
On the most basic level, a homemade lotion only needs 3 ingredients:
- A Carrier Oil
- Water
- An Emulsifier (something that bind mix oil & water together)
That’s it!! That’s all a lotion is-the water is meant to be suspended in an oil so that both can penetrate the skin, delivering moisture to dry skin!
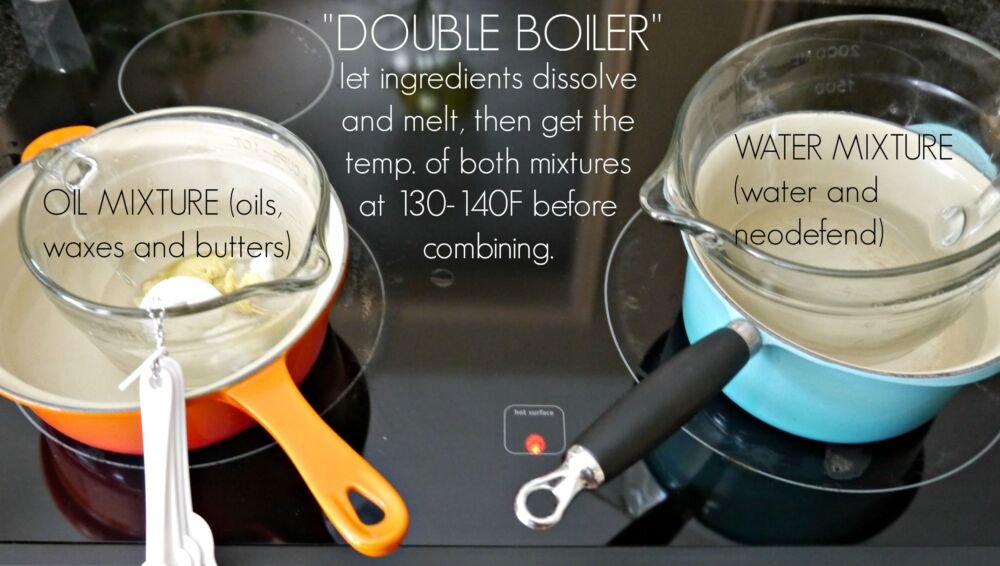
When making lotion, there are 2 phases, an oil phase and a water phase. Both phases have to be heated on the stove top seperately. Once they reach a certain temperature, you can combine them, mix the solution and then wait for it to thicken.
The Oil Phase Ingredient Choices:
Don’t be fooled by ingredient labels of creams-You don’t have to use 5-9 different oils for one recipe! One is just fine! I tend to keep things simple and I think my skin appreciates that.
Now, let’s begin by choosing an oil. Oil is the main ingredient in lotion making.
I’ve spoke often of my love for Olive Oil. I love it in my food and I love it on my skin. Olive Oil really brings home the phrase-“If you can’t eat it, don’t put it on your skin!”. It’s a wonderful moisturizer for the skin with it’s high antioxidant levels and fatty acids. Of course, you want to buy organic, extra virgin, cold pressed olive oil-Basically, this ensures there are no pesticides, and very little processing which helps retain all the beneficial properties. I like to use THIS brand. Olive oil is an easy choice since many of us already have it in our pantry.
You can also use unrefined or refined coconut oil but I find that it is not as moisturizing as olive oil. If you are needing more healing than moisturizing, coconut oil might be your best choice. Unrefined coconut oil is incredibly healing and a great choice in a sunburn relief lotion! It also is great for skin conditions like rashes, bug bites, wounds and eczema.
Other natural oils to consider are Jojoba oil, Grapeseed Oil, Sweet Almond Oil, Hazelnut Oil, Fractionated Coconut Oil etc.
Butters fall into the oil category as well. Mango Butter is fast absorbing and raw shea butter can help restore collagen. Butter is optional but the addition makes for a lovely, rich lotion. Cocoa butter is also a fun option. It does smell like chocolate after all!
Emulsifiers:
The next ingredient is an emulsifier. An emulsifier is added to the oil phase. It is an odorless, waxy substance that comes in the form of pastilles making it very easy to measure.
Everyone knows oil and water don’t mix. You’ve got to use something that will mix them. This is where emulsifying wax comes in. I have only used Mountain Rose Herb’s Emulsifier. After all these years of cream making, I’m still not through their (very affordable) 1 lb. bag! I need to try another brand so I can offer more options but for now, I can’t guarantee a successful lotion if you don’t use MRH’s emulsifying wax.
Can beeswax emulsify oil and water? The answer is kind of. LOL. I get this question often so I decided to give it a try. My Aloe Vera Beeswax Lotion turned out great! It did emulsify. However, it hardened kind of like a hard cream. I didn’t mind it though. It was very hydrating. I have heard that it separates after time. I used mine up quickly so I didn’t experience that.
Water Phase Ingredient Choices:
The third ingredient is water. Your water needs to be distilled-this cuts down on bacteria and fungal growth. No one wants to make a cream with bacteria/fungus already in it!
Other water based ingredients you could choose instead of distilled water are aloe vera gel, witch hazel, glycerin or rose water. You can even use hyaluronic acid!
Natural Preservatives:
A preservative is 100% necessary when water based ingredients are involved in a recipe. Any time water is present in a lotion recipe, it becomes a breeding ground for bacteria.
Most of the time a preservative makes up only about 1-2% of the entire recipe.
Many blogs will say you can get away without a preservative or suggest you use grapefruit seed extract. Not using a preservative in a recipe containing water is not only foolish, it can be dangerous. As far as GSE, I have not personally used it and hear over and over that it is not enough to give your diy lotion recipe a long shelf life.
If you plan to not use a preservative, you must make small batches at a time and store in the fridge.
Personally, making your own lotion can be time consuming and more labor intensive than most natural products like lip balms and lotion bars. You really want to honor the time and work it took and enjoy your creation for more than a couple of weeks!
Using a natural preservative will extend the freshness of your cream for about 3 months. I recommend Neodefend. It is a natural, broad spectrum (meaning it works on many types of bacteria) preservative and is very affordable.
Essential Oils:
Essential oils are a great way to make your homemade lotion smell amazing! Fragrance oils are harmful to your health especially your hormones. A few drops of essential oil go a long way and can boost the effectiveness of your homemade cream!
Lavender is always my go-to essential oil but I also like to add geranium, cypress, ylang ylang and rosemary. Play around with different combos to find out what scentsnsmell good to you!
Vitamin E oil is another fantastic additive that not only delivers anti aging properties, it’s a powerful antioxidant and full of nourishment. It has also been said to prolong the shelf life of your DIY lotion.
I prefer to get my essential oils at Plant Therapy. They have organic options and are very affordable. Plus they offer fast and free shipping on all orders!
Why Make Homemade Lotion?
Besides the fact that it’s fun and rewarding, many conventional lotions are FILLED with an incredible amount of unpronounceable, harmful ingredients. By learning how to make lotion, you can control exactly what you are putting on your skin. You can customize your recipe to suit your skin’s exact needs.
What is nice about learning how to make lotion is that you can use as many or as few ingredients as you choose. You can also play with different essential oils to create beautiful, and natural scents that will actually serve a purpose in your cream rather than harm the balance of your body.
Once you know how to make lotion, you can now make a variety of new products like eye cream, after sun lotion, body lotion, anti aging face cream, foot cream, hand cream and even a firming neck cream! And you guessed it, I have all those recipes except the firming neck cream which I’m working on as we speak!
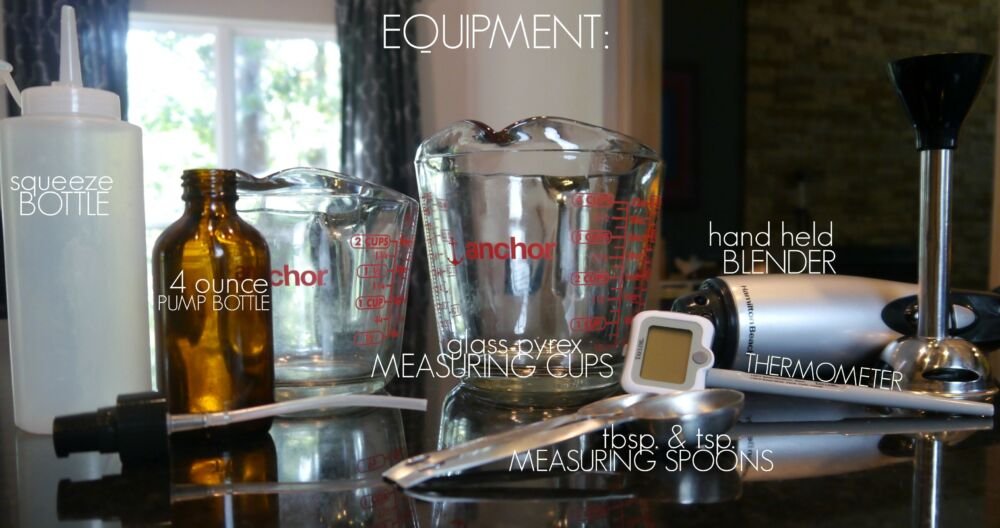
Equipment You’ll Need:
- Thermometer
- Immersion Blender or Electric Mixer
- 2 glass measuring cups
- Tablespoon
- Teaspoon
- Plastic Condiment Bottle or Funnel
- 4 ounce pump bottle (preferably glass) or small jar
For simplicity sake, we’re going to make a very small batch of DIY lotion so that we can skip the preservative. This cream will last 1 week in room temperature or 2 weeks in the fridge.
I figured you might want to see if making lotion is doable for you before you buy another ingredient that you won’t use unless you continue to make lotion.
However, I have linked a preservative and added it to this recipe as an optional ingredient if you’d like to lengthen the shelf life of your lotion.
Most DIY skin care recipes are in percentages. For example, a typical lotion is 70% water, 20% oil and 10% emulsifier. To make things more simple, I will translate this in cups and tbsp. If you want to make a bigger batch, just double the recipe!
Continue to Content
How to Make Lotion
Yield: 4 ounces Prep Time: 1 hour Total Time: 1 hour
In this in-depth, picture tutorial guide, you will learn exactly how to be successful in making a light, fluffy cream your skin will absolutely love!
Materials
- 3 tbsp. Oil (1.5 ounces)
- 6 tbsp. distilled water (3 ounces)
- 3/4 tbsp. Emulsifying Wax (.5 ounces) *1 full tbsp. makes the cream too thick to get out of a bottle-if you like your cream really thick, you’ll need to put it in a jar.
- 1/2 tsp. preservative (optional)
- 10 drops of essential oil (optional)
Tools
- Thermometer
- Immersion Blender or Electric Mixer
- 2 glass measuring cups
- Tablespoon
- Teaspoon
- Plastic Condiment Bottle or Funnel
- 4 ounce pump bottle (preferably glass) or small jar
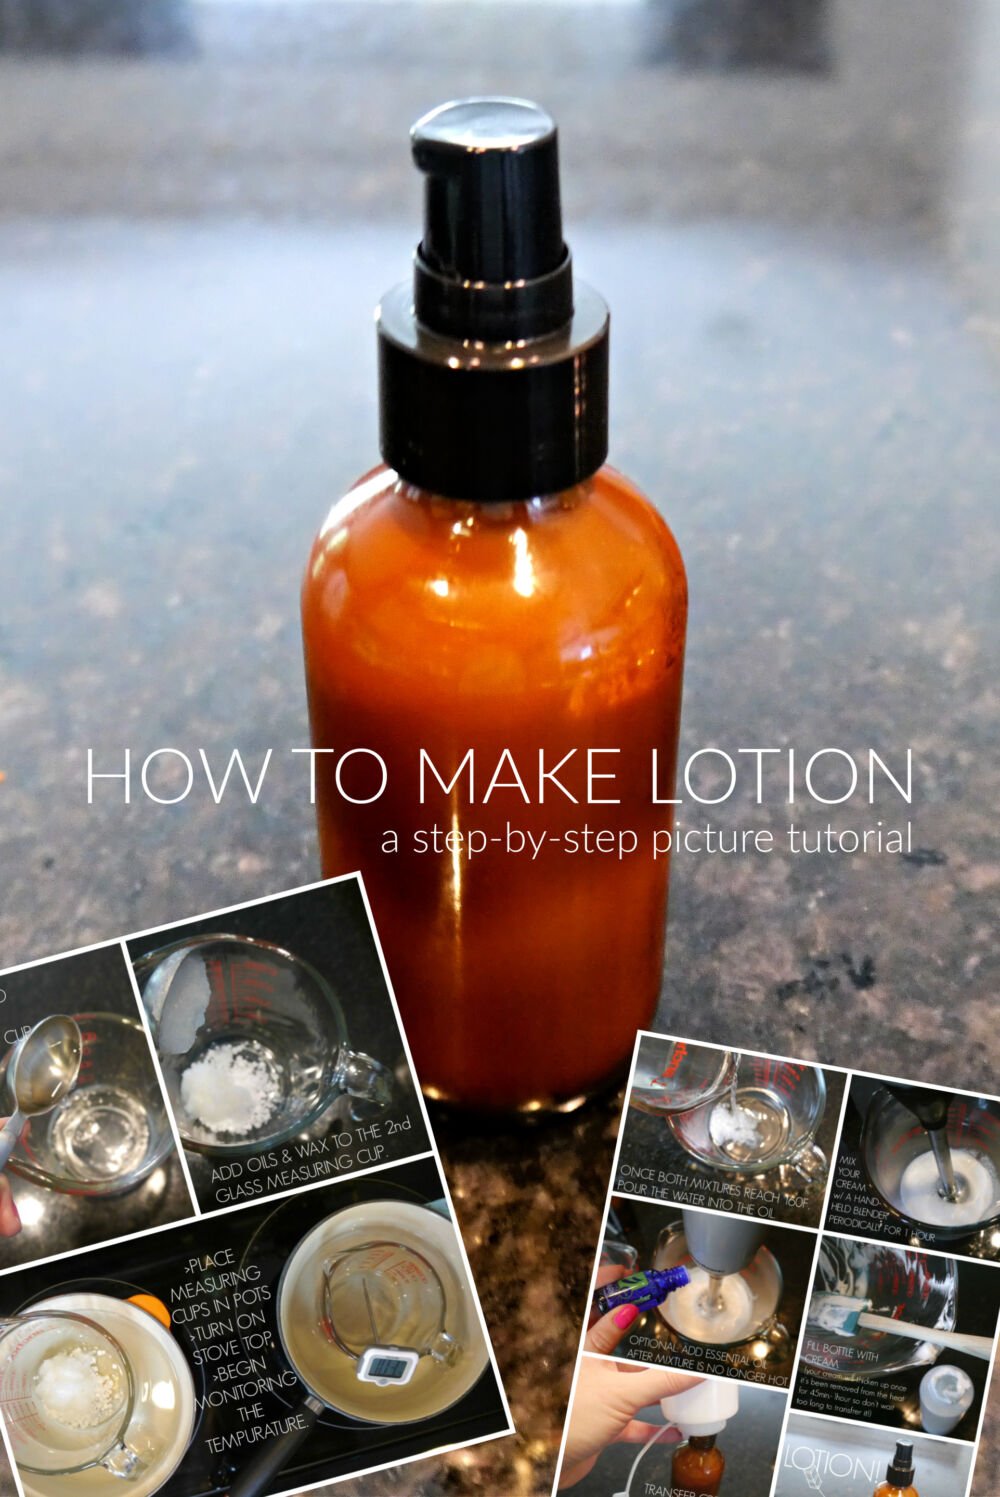
Instructions
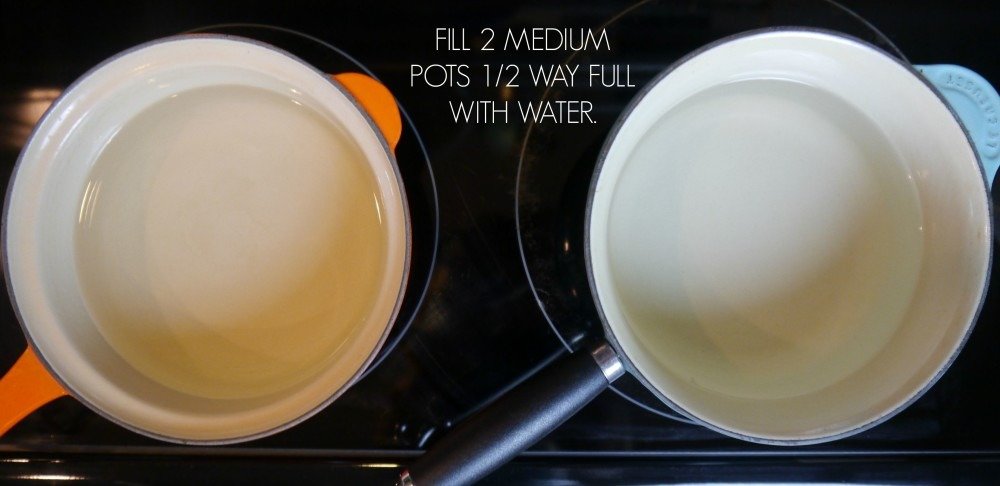
- Create 2 double boilers by getting 2 medium sized pots, filling them about 1/2 way full of water, then placing a glass pyrex spouted glass bowl inside the water.
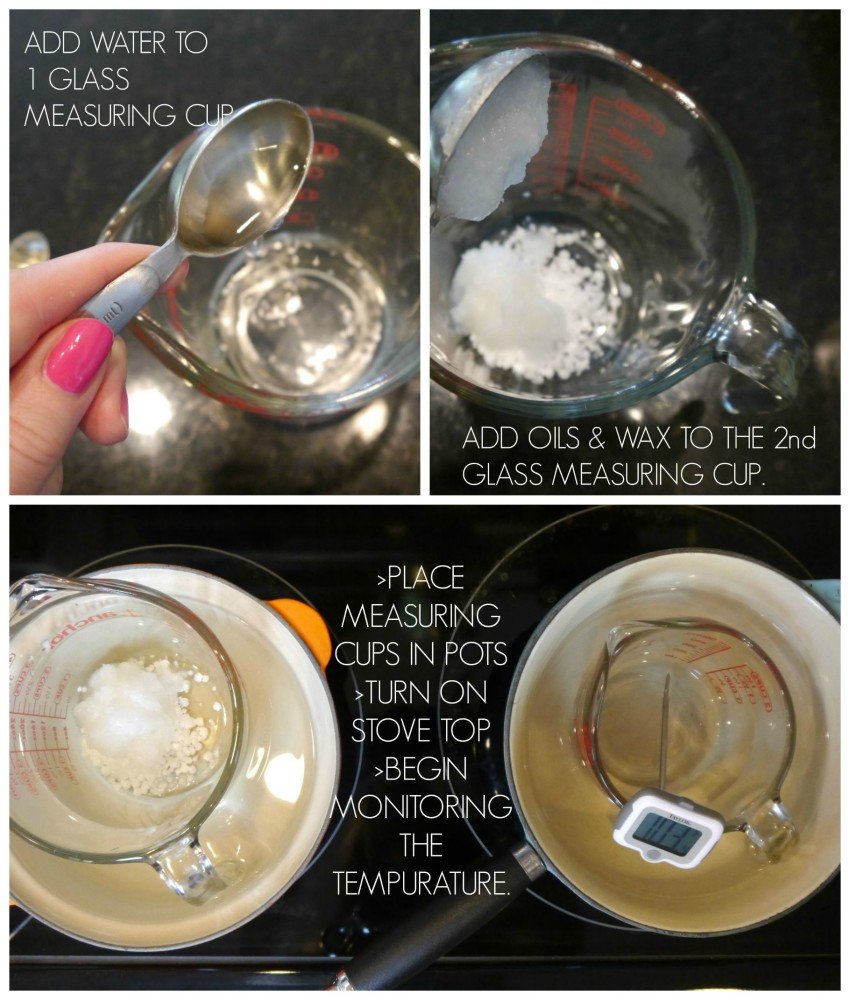
- Prepare your oil phase by adding the emulsifying wax and oil to your glass pyres bowl.
- Prepare your water phase by adding the 6 TBSP. of distilled water to the other glass pyrex bowl.
- Heat both mixtures, but remember, oil heats faster then water. This is the tricky part. You must make sure the emulsifying wax is completely melted. You might have to remove your oil mixture from the stove while your water mixture catches up or vice versa. Don’t walk away from your stove-this part can seriously drive you nuts if you don’t keep your full attention on your mixtures!
- Heat both mixtures to around 160 F., try to keep both mixtures around this temp for 20 minutes. This will help kill bacteria and will also help your cream emulsify properly.
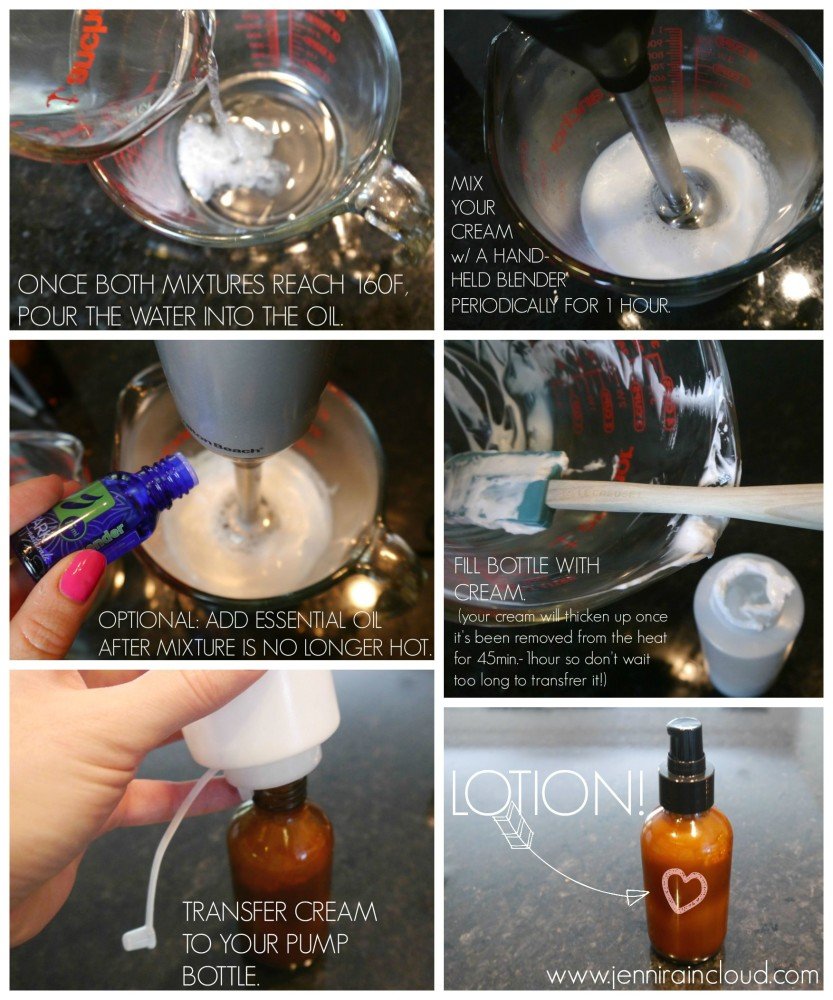
- Add your water phase into your oil phase.
- Using your immersion blender, blend your mixture for at least 1 minute.
- Continue to come back every 10 minutes or so to blend for 30 sec.-1 minute for the next 45 minutes to an hour.
- Add essential oils and/or vitamin E oil.
- Transfer to pump bottles or small jars.
Notes
Your cream will continue to thicken for the next 24 hours.
This recipe make 4 ounces.
If you choose not to use a preservative, you must use within 2 weeks and store in the fride.
If you use a preservative, your cream will last up to 3 months.
Did you make this product?
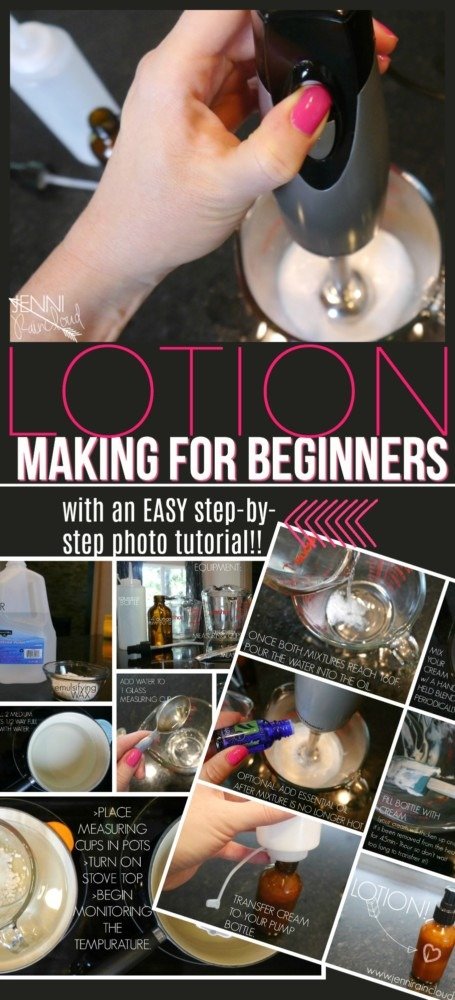
Step By Step DIY Lotion Tutorial:
Making a homemade lotion is really easy-not rocket science at all. You just gotta try it-it’s still so rewarding to me to make a homemade lotion! I still get giddy when my mixtures emulsify and thicken and my final product is thick and fluffy!!
Just by adding a carrier oil and butter and a few drops of essential oils, you can make your cream unique and work perfectly for your specific skin type! Sky’s the limit!
If you’d like to skip the water and save time, I have recipes for a homemade lotion bar as well as a DIY body butter. Both of these diy recipes only require one double boiler and take less time to prepare. Plus, they don’t require a preservative and have a shelf life of 6 months.
Remember-the shelf life of anything that contains water is about 2 weeks and it’s best to keep it in the fridge just to be safe. I used to hate adding preservatives to my cream, but it really does make sense. You really don’t want to be slathering bacteria and mold all over your skin!
The natural preservative I have researched only make up about 1-2% of your cream so you shouldn’t be apprehensive about using it. With the preservative I approve of, you can still call your cream organic and paraben free!
For today-making an easy homemade lotion with minimal ingredients, effort and money will ease your mind that making a cream is extremely doable and FUN!
You might also want to check out my Troubleshooting Lotion Making post!
xx, Jenni
P.S. Don’t forget a cute label! I use THESE labels, upload my design to HERE and print!!

PIN IT!!!