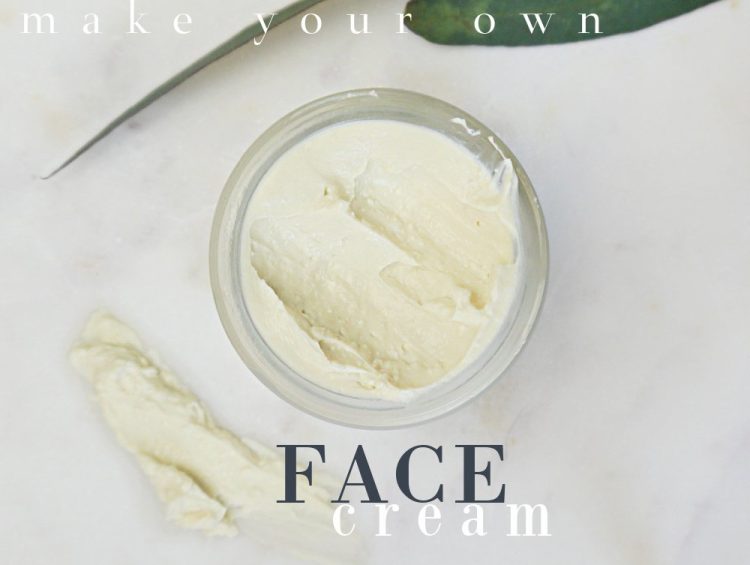
Jump to Recipe
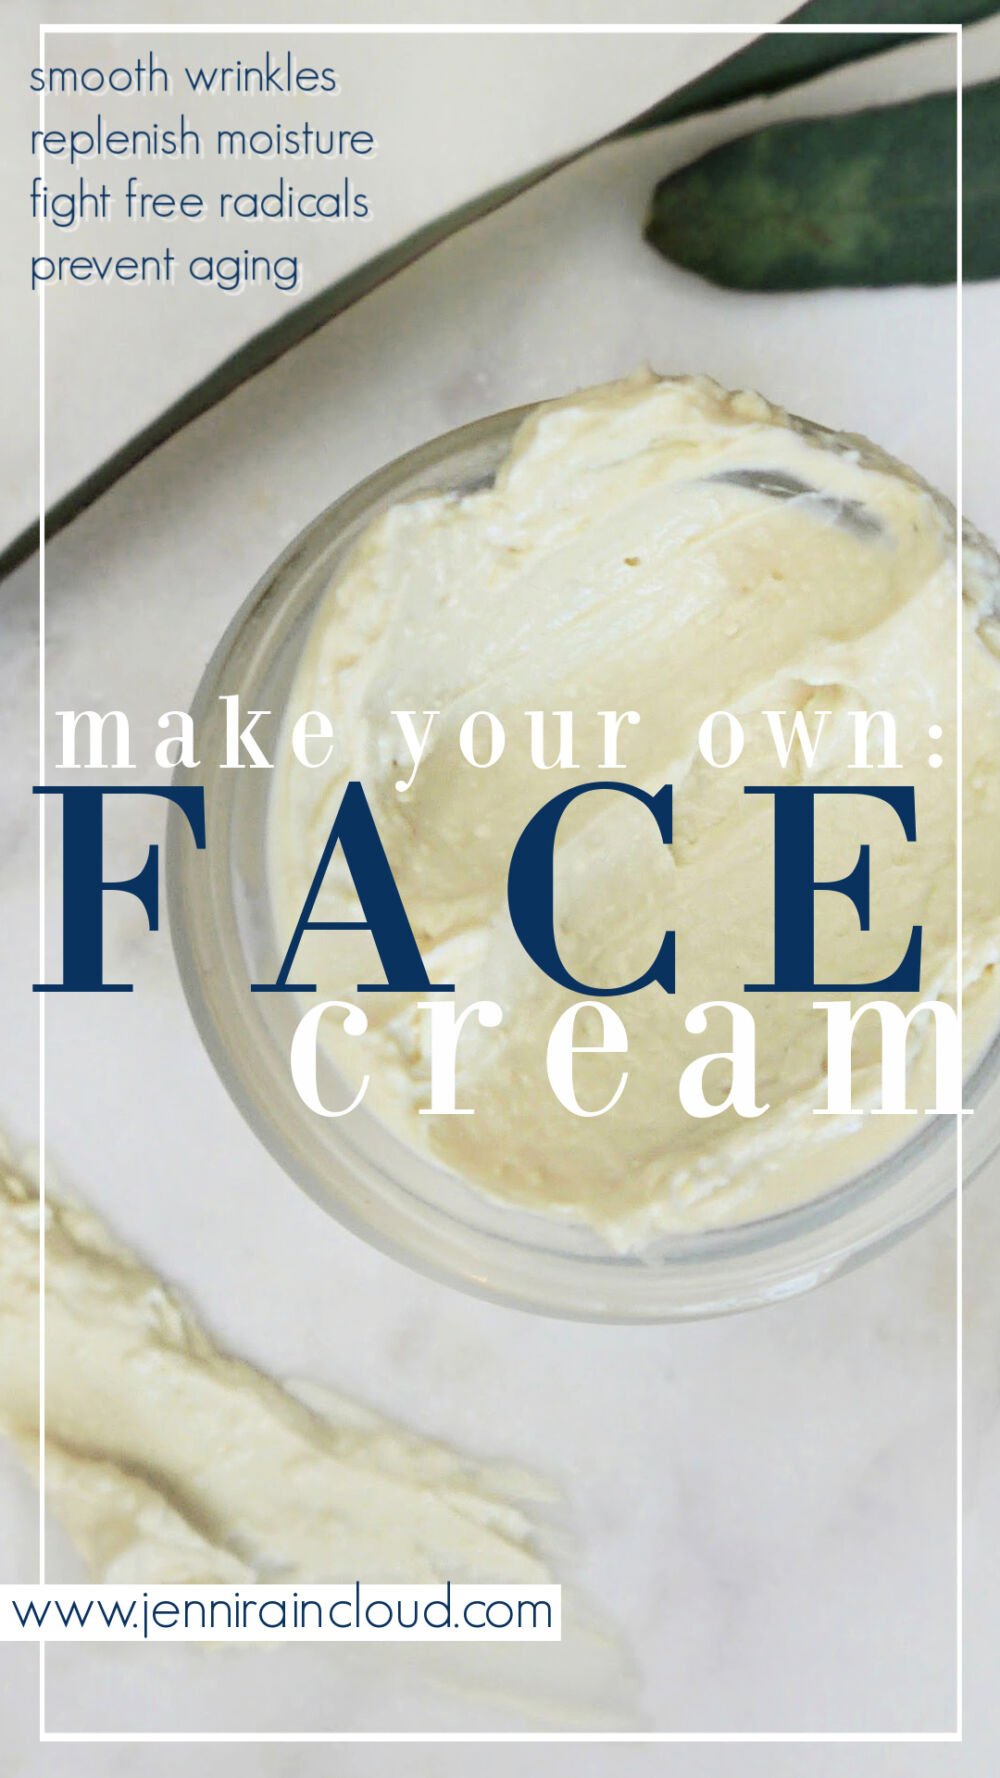
You might not know that you can easily make a DIY facial moisturizer that will firm and rejuvenate your skin. This recipe is one of my most popular anti aging recipes that many have found effective. Get ready because making a cream can be a bit labor intensive but once you experience the thick creamy goodness that is homemade face cream, your skin will drink it up and you’ll feel incredibly accomplished!

Disclosure: This post contains affiliate links, meaning, at no additional cost to you, I will earn a small commission if you click through and make a purchase. Learn more
I’m going to be really honest with you at the risk of sounding vain-I’m concerned about wrinkles. I haven’t quite accepted that I don’t have 20 year old skin anymore. In the future I plan to settle down about this but for now I’ll just keep coming up with anti aging potions and this DIY face moisturizer has become a big favorite of mine and helped to smooth and plump my skin!
This homemade moisturizer is not only moisturizing, it also is firming and will help even skin tone! It is perfect for aging skin but any skin type can benefit. Get ready, this is the mother of all “anti aging” moisturizers!!!
First off, let’s discuss one reason skin starts to age…
In your late 30s, wrinkles suddenly look deeper because the skin’s natural oils decrease, the moisture barrier breaks down, and the skin dries out. This is why I focus so much on moisturizing. If you don’t replenish your skin’s oils, wrinkles will form. It’s amazing to me how different my skin looks when it is dry and dehydrated. Using the right emollient can make a massive difference!
Why Make Your Own Face Moisturizer?
You might question whether it’s worth it to make your own facial moisturizer. In the majority of store-bought products you will find a long list of harmful chemicals, especially in products making anti aging claims. Creams/lotions that you buy at a store are also full of water, thickeners, emulsifiers, preservatives and artificial fragrances. None of which are beneficial for the skin. In fact, many ingredients in a cream/lotion product can cause more harm than good.
In my cream recipes, we must use a preservative and emulsifier and water is a necessary ingredient to make a light, soft cream but I keep these ingredients to a bare minimum and I choose a natural preservative and a plant based emulsifier. We also don’t rely on unnatural fragrance and turn to essential oils instead.
Another angle to think about is that many over the counter creams can be expensive. You get 1 jar or bottle and up to half or more of that container is water! When you begin making your own beauty products you must build your ingredient inventory and this can seem like a lot but with those ingredients, you can still make tons of more beauty products for years to come!
When you calculate how much it costs to make 1 jar of face cream, it’s a fraction of the price of a typical anti wrinkle cream you’d buy from a skincare company.
Homemade Face Moisturizer Ingredients:
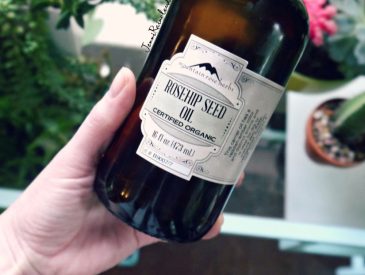
- Rosehip oil– Rosehip Oil penetrates deeply into the lower layers of the skin. It regenerates cells and increases collagen production. It is rich in vitamin C, Omega-3 and Omega-6 fatty acids and retinoic acid, which studies have shown it brightens and tightens skin! Rosehip seed oil also helps restore skin’s elasticity, fade age spots, reduce broken capillaries, and balance oil glands. It is very beneficial to dry, irritated and mature skin.
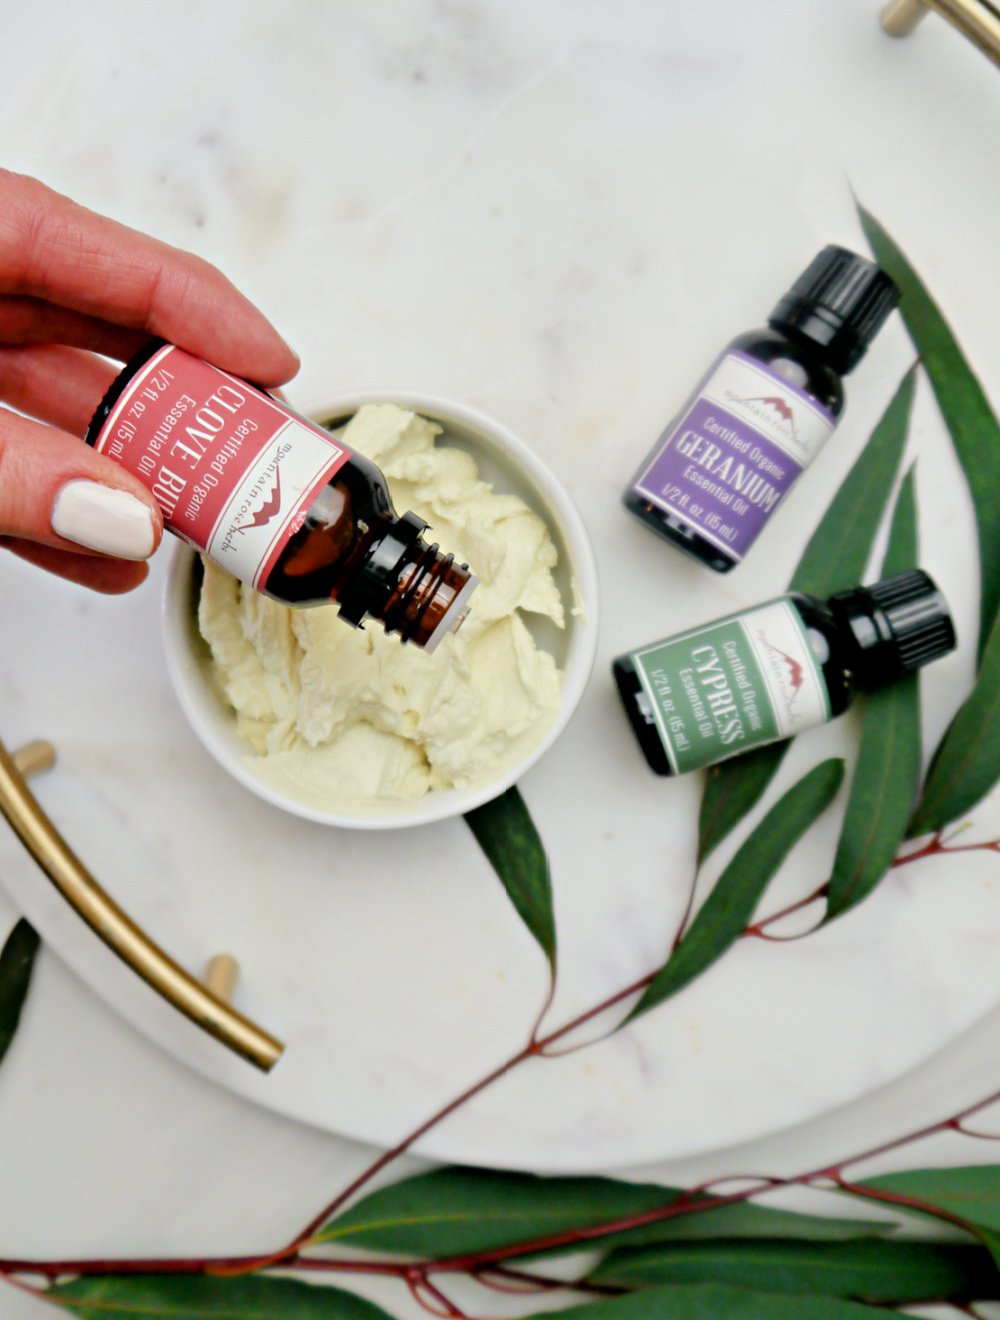
- Cypress Essential Oil– Cypress Oil is an amazing oil-It has been used to treat incontinence because it’s tightening action is so strong it can be applied on the skin over the bladder to help the bladder to tighten. Wild huh? Cypress oil also improves circulation, strengthens blood capillaries, is antibacterial, anti-infectious, and anti-microbial. Wow! Cypress oil is amazing for varicose veins and broken capillaries. It’s firming and tightening action is what really excites me!
- Clove Essential Oil-Clove seems like an odd choice to put on your skin, I know. It’s a “hot” oil so we’ll only be using a tiny amount. The ORAC (Oxygen Radical Absorbance Capacity) value is 1,078,700!! This tells you antioxidant capacity–Uh….. clove’s number is exceptionally high. Just in case you don’t know-antioxidants are a really good thing. Especially in the anti aging realm. Antioxidants attack free radicals in the skin that are there to harm and age skin. Clove also has powerful anti-inflammatory properties.
- Geranium Essential Oil-Geranium is one of the top essential oils for beautiful skin. When in doubt-add Geranium. Geranium is great for regenerating skin cells and revving up circulation. It is extremely healing. It also promotes even distribution of melanin-which helps even out the overall tone of the skin.
- Pomegranate Oil-Pomegranate oil helps protect and restore collagen and elasticity. It penetrates deeply which makes it a fantastic oil for this wrinkle cream. After all, oils don’t help us if they can’t get deep into the epidermis. Pomegranate oil helps balance the skin as well as improve skin tone. It is high in vitamin C, moisturizes thoroughly and has high antioxidant properties.
- Avocado Oil-Avocado oil should be added to this recipe if your skin is really dry. Avocado Oil is a very rich oil that boosts this creams moisturizing ability. This oil is very high in Vitamin E. It is a powerful antioxidant that strongly fights free radicals. According to this study, avocado oil can increase collagen metabolism. Compared to other fruits, avocado has the highest amount of vitamin E. Vitamin E not only helps to moisturize but has anti aging qualities as well.
Alternative Ingredients:
I have chosen specific carrier oils and essential oils for this diy face moisturizer. However, there are many wonderful ingredients you could use instead of the ones I recommend. A few powerful oils that would work are argan oil, jojoba oil or sweet almond oil. I would not recommend grapeseed oil, virgin coconut oil or olive oil for this particular recipe.
I did not add a butter into this recipe but you totally could replace one of the oils for a butter like cocoa butter, shea butter or mango butter. Using a butter in any homemade beauty products helps relieve overly dry skin that suffers with dry patches.
Instead of 1 cup of distilled water, you can use any water based ingredients here such as an hydrosol, hyaluronic acid or aloe vera gel.
As far as essential oils go, I love the blend I have chosen but you can omit what you don’t have if you are wanting to save money. For anti aging, I also love carrot seed oil for wrinkles and tea tree oil for it’s antibacterial properties for combination skin or acne-prone skin.
Preserving Your DIY Moisturizer!
Distilled water must be used in order to keep your cream fresh longer.
I have included a preservative with this recipe. NeoDefend is considered certified organic and non-GMO. It is antioxidant and very gentle to the skin. Those of you weary of using a preservative must remember that it only makes up .75-1% of your product. You can read more about and purchase NeoDefend HERE.
What You’ll Need to Make DIY Face Moisturizer:
- 1/4 cup Rosehip oil (buy it HERE)
- 2 TBSP. Pomegranate Oil (buy it HERE)
- 2 TBSP Avocado Oil (optional) (buy it HERE)
- 1.5 TBSP Emulsifying Wax (buy it HERE)
- 15 drops Geranium Essential Oil (buy it HERE)
- 15 drops Cypress Essential Oil (buy it HERE)
- 5 drops Clove Essential Oil (buy it HERE)
- 10 drops Lavender Essential Oil (buy it HERE)
- 1 cup distilled water
- 1/2 tsp. NeoDefend (buy it HERE)
- Immersion Blender
- Meat Thermometer
- 2 Medium Sized Pots
- 2 Glass Bowls (Pyrex glass measuring cups work really well since they have a spout)
- Measuring Cups
- Measuring Spoons
- Funnel
- 4 ounce pump bottles or a 12 ounce jar.
Continue to Content
DIY Facial Moisturizer Recipe
Yield: 12 ounces Prep Time: 1 hour Total Time: 1 hour
You might not know that you can easily make a DIY facial moisturizer that will firm and rejuvenate your skin. This recipe is one of my most popular anti aging recipes that many have found effective. Get ready because making a cream can be a bit labor intensive but once you experience the thick creamy goodness that is homemade face cream, your skin will drink it up and you'll feel incredibly accomplished!
Materials
- 1/4 cup Rosehip oil
- 2 TBSP. Pomegranate Oil
- 2 TBSP Avocado Oil
- 1.5 TBSP Emulsifying Wax
- 15 drops Geranium Essential Oil
- 15 drops Cypress Essential Oil
- 5 drops Clove Essential Oil
- 10 drops Lavender
- 1 cup distilled water
- 1/2 tsp. NeoDefend
Tools
- Immersion Blender
- Measuring Cups
- Measuring Spoons
- 2 medium sized pots
- 2 glass Pyrex measuring cups (for double boiler)
- Meat Thermometer
- Glass Containers
- Funnel
Instructions
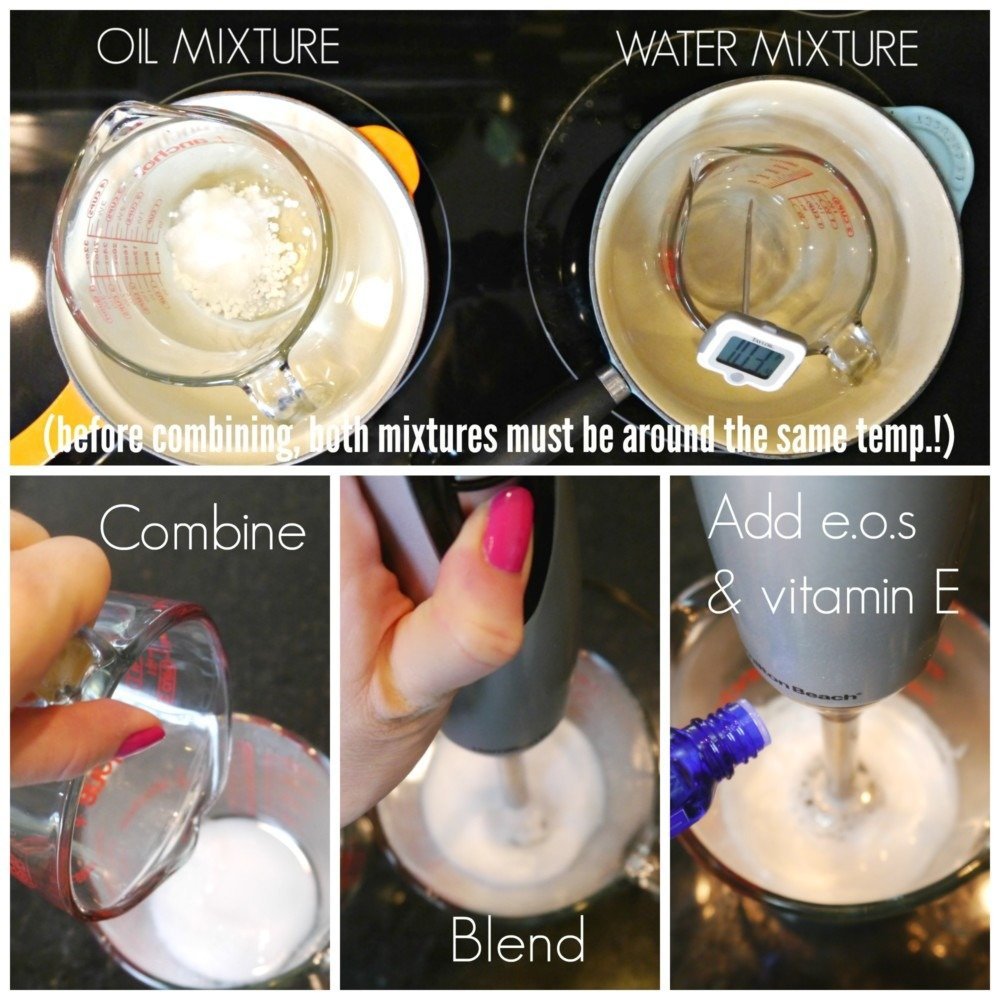
1. Fill 2 medium pots 1/2 way full with water.
2. Place a glass bowl or Pyrex measuring cup with a spout in each pot.
3. Heat wax and oils in 1 pot and water and neodefend in the other pot.
**Remember that oil heats up faster then water. Your goal is to get both mixtures at the same temp. before you can combine them so take care to not heat your oils to quickly-I raise the heat on my water mixture higher to balance out the difference.**
4. Once the emulsifying wax is melted and the neodefend has dissolved, and both your water mixture and your oil mixture are around the same temperature, remove from heat and pour the water into the oil.
**As a rule of thumb, both mixtures need to be about the same temperature when mixed. This temperature is typically around 160 degrees.**
5. Take a immersion blender and mix your water/oil mixture for about 40 seconds to 1 minute. Let stand for 15 minutes then mix again for about 30 seconds again. Once you notice that the water isn’t separating at the bottom of your bowl after not mixing for a few minutes, you are done mixing. This process can take up to 1 hour. You can’t mix your cream too much so make sure you’ve done enough mixing before moving on to the next step.
6. Once your mixture is no longer hot, add your essential oils then pour into containers.
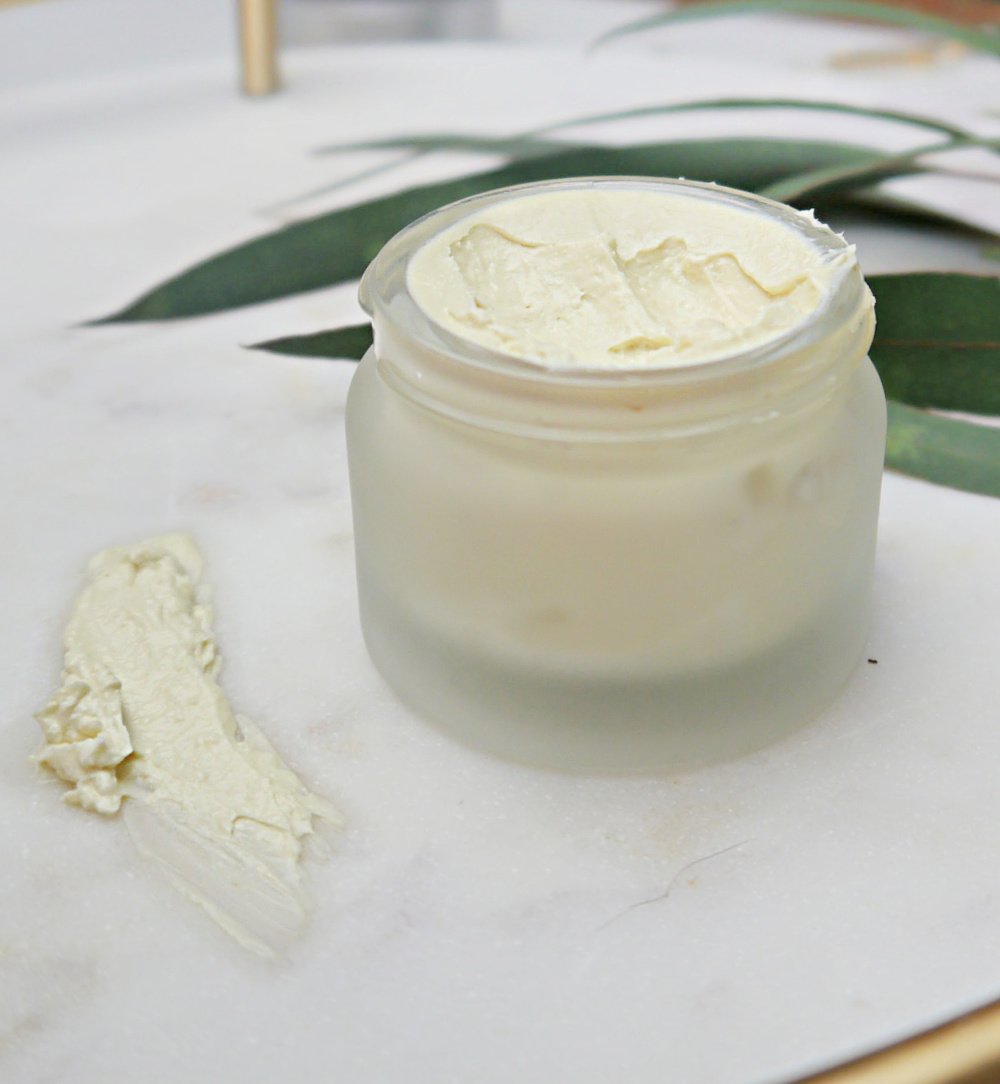
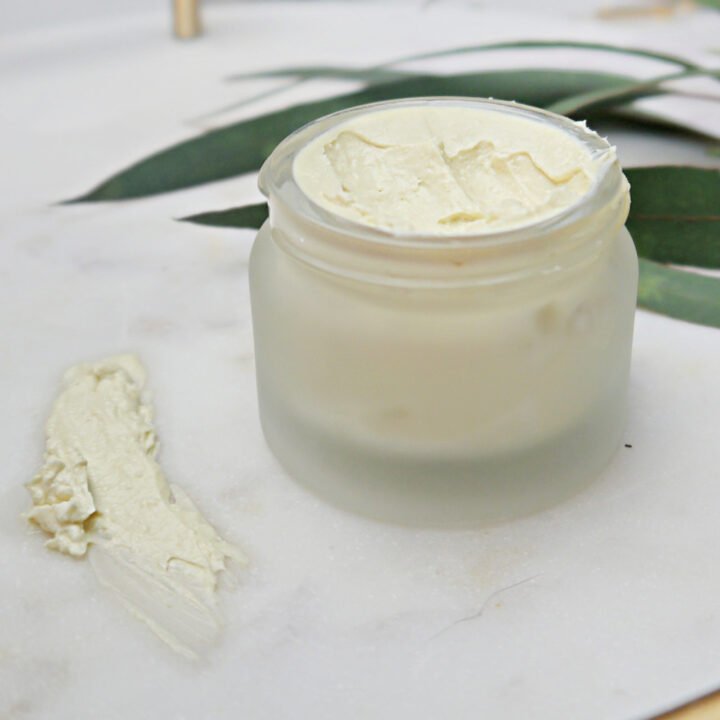
7. Let containers set for 24 hours. Your cream will thicken in this time.
Notes
This recipe make 12 ounces. I recommend dividing the 12 ounces into 3 4 ounce pump bottles and storing what you aren't using in the fridge for optimal freshenss.
Did you make this product?
Go HERE for a more detailed account of how to make a cream and I’ve also written a trouble shooting cream making!
Looking for an Easier DIY Facial Moisturizer?
Is this natural face moisturizer recipe more than your bargained for?
Adding water to a carrier oil is more involved than creating something like a face oil or a balm. If you enjoy creating diy skincare products, you must make a cream at some point just because it’s fun and the end product can be so light, fluffy and creamy. However, moisturizers that contain water aren’t always the best way to relieve dry skin and reduce the appearance of wrinkles.
A face oil or beauty balm contains no water, therefore they are more powerful and potent than a cream that contains up to 50% water. Below I’ve listed my most effective (and easier to make) recipe for a natural moisturizer.
- coQ10 Sea Buckthorn Face Oil
- Vitamin C Boosting Sea Buckthorn Balm
- 3 in 1 Beauty Balm
- Rejuvenating Face Oil
You could easily keep this recipe and omit the emulsifying wax, water and neodefend. This would be a wonderful facial oil!
Facial Moisturizing Storage:
This recipe makes 12 ounces.
Your cream should always be stored in a glass jar or glass bottle, preferably dark glass. This will also keep your cream bacteria free longer. Any container that allows you to pump out your lotion is a good idea-this keeps you from depositing bacteria from your hands into your lotion.
I like to store mine in a 4 ounce glass bottle with a pump or cap so I can prolong the shelf life. I keep the rest in the fridge until I’m ready to use it! Find 4 ounce bottles HERE.
There you have it-this recipe has strong anti aging potential!
Always use high quality ingredients in your recipes. I have linked all the products I personally use.
Use this DIY face cream morning and night after cleansing and toning. For an added anti aging boost, make this easy Anti Wrinkle Eye Stick to rejuvenate and smooth fine lines around the eyes!
xx, Jenni
PIN IT!!!