Many of you are out there considering making your own products but don’t know where to start. Some of you might even be wondering why would you make your own beauty products?? Go HERE for info on why. I remember when I started playing with the idea of replacing my facial products at my spa with homemade skin care. I was so overwhelmed! I wasn’t sure I could actually make quality products that my clients would approve of-after all facials are expensive! Today I’m writing my Beginner’s Guide to DIY Skin Care in the hopes I can clear up any trepidation you might have if you’re undecided on this hobby!
I started searching the internet for DIY recipes. Let me tell you, I tried A LOT of duds. Many recipes I ran into, while they were organic and clean, they were GREASY and/or lumpy!!! Plus, I was confused about preservatives-I knew you needed them to be safe but I just wasn’t sure if I could add them and still keep my products healthy.
I’m hoping this post will answer your questions and give you a place to start! I believe in making things as simple as possible so read on for my tips on making your own skin care.
Words to live by:
If you can’t eat it, don’t put it on your skin.
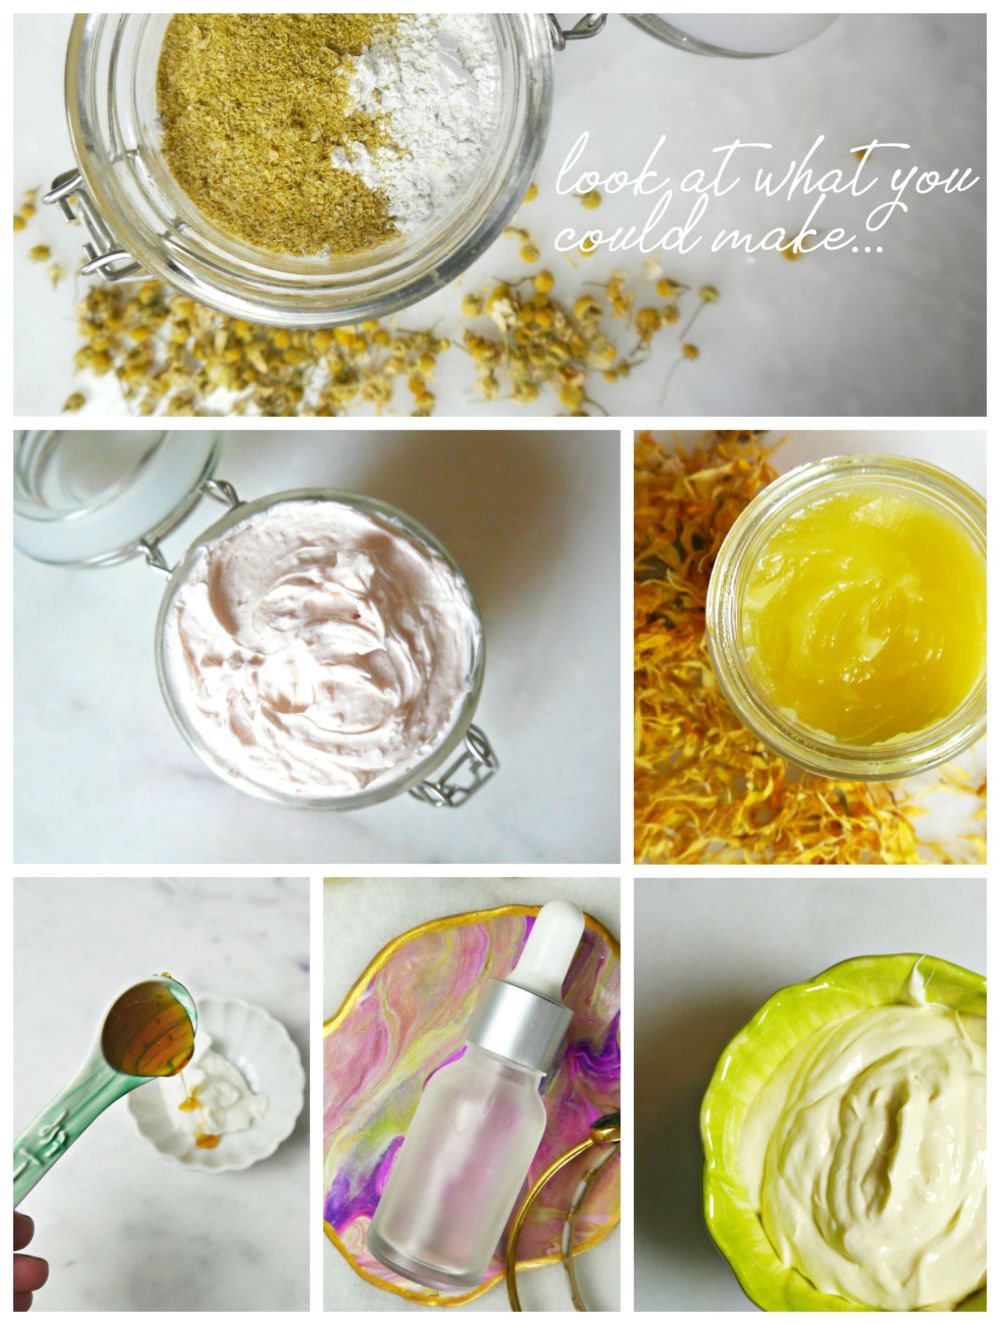 Basic Ingredients to Invest In:
Sweet Almond Oil-One of the absolute best carrier oils for anti aging. It is full of Vitamin E, which helps with nourishing and tightening. It is an affordable oil and has little to no smell. You can add this oil to any product that calls for a carrier oil-it is wonderful for just about every skin type!
Coconut Oil-Perfect for healing and calming. Anti fungal and antibacterial, it’s the perfect oil for salves. I love adding a tablespoon or 2 of coconut oil because it makes everything so much creamier! I don’t suggest using coconut oil on the skin. It isn’t the best moisturizer and could cause clogging.
Beeswax Pastiles-Beeswax is used when you need to thicken up oils. It will not blend water and oil together. I have tried several times. Beeswax is very beneficial for the skin and acts as a protective barrier allowing essential oils, butters and carrier oils to penetrate the skin. Always buy pastiles so you can measure with ease. I suggest staying away from white pastiles because they most likely have been bleached. Yellow is way more antural!
Emulsifying Wax-I don’t love using emulsifying wax because I feel it serves no beneficial purpose for the skin, but it is 100% necessary if you are making a lotion. It simply binds water and oil and allows them to thicken. The more you use, the thicker your cream. Be sure to purchase yours from Mountain Rose Herbs-theirs vegetable based and comes from naturally occurring fats and esters.
Vitamin E Oil-I add this antioxidant oil for it’s anti aging qualities, but I also like it because it will help preserve your products.
Rosehip Seed Oil-This is one of the most popular carrier oils that reduces the signs of aging. While it is a little more expensive, it is a great addition to your skin care ingredients. It makes creams incredibly silky while reducing sun spots and wrinkles! I even mix it with my powdered mineral make up for flawless coverage!
Citric Acid-Citric Acid actually lowers the pH of your product, making it more acidic. Bacteria does not grow as easily or rapidly in an acidic enviorment. Technically, citric acid is not a preservative but it does help prolong your shelf life. The citric acid I use comes from Mountain Rose Herbs-a company I trust to keep it real! Citric acid will typically be used in cleansers. Citric acid can not be used with the preservative Neodefend.
NeoDefend-NeoDefend is my preservative of choice. A preservative is very important in recipes that contain water because water is notorious for forming mold and bacteria. While pursuing beautiful skin, mold and bacteria are not a good thing! NeoDefend is very gentle for the skin, unlike typical preservatives. It is non-GMO and certified organic. Each recipe only takes a tiny bit, a little bit goes a long way.
Distilled Water-Always use distilled water in your lotion recipes. Because all the minerals are removed, it will help your cream from going bad so quickly.
Equipment:
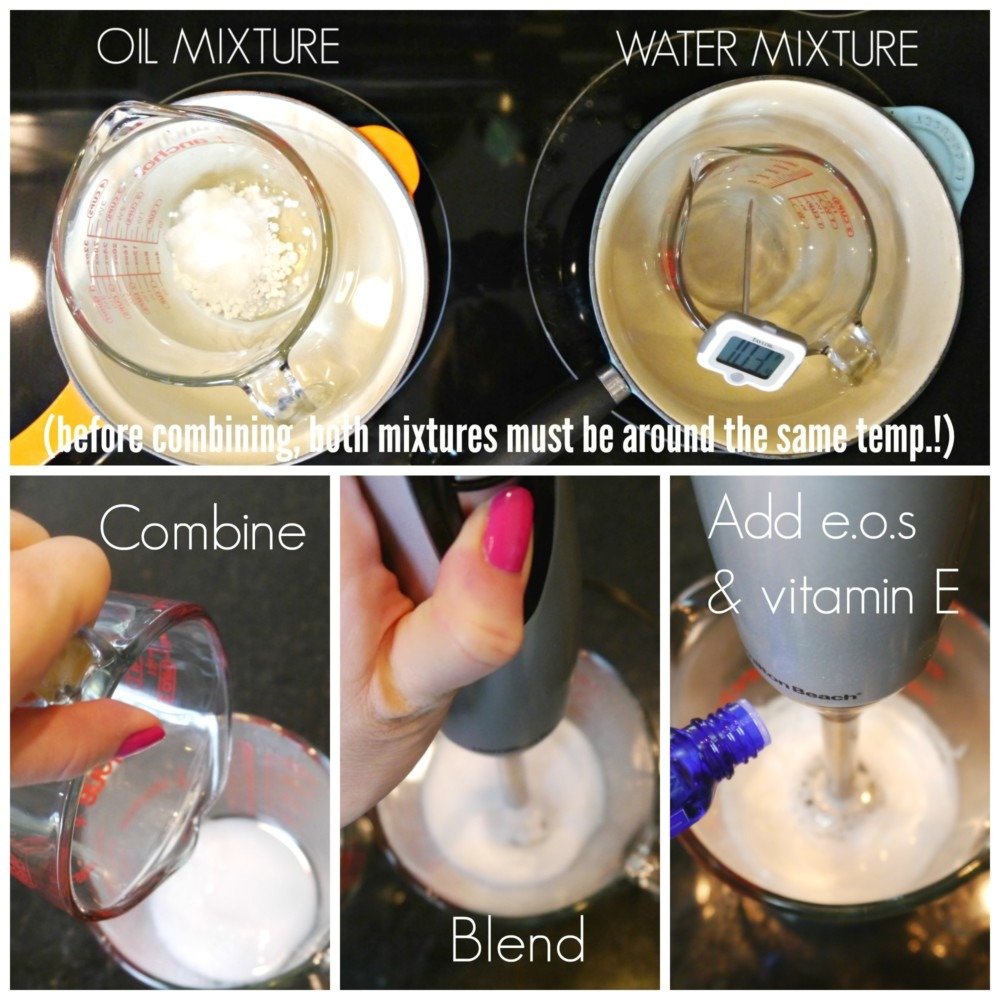
Double Boilers-Translated a medium sized pot filled halfway with water and a glass pyrex bowl (like THIS) placed inside. This keeps your ingredients from getting too hot. When working with carrier oils you want to keep the heat at a minimum because heat will take away the benefits of your oils. If you are making lotions, you will need 2 double boilers.

Hand Held Blender-This is an absolute must when making lotions. They are so much better than blenders. Blenders tend to be a MESS to clean up and often create way too many air bubbles.
Measuring Cups and Spoons–any will do but you need a well labeled set.
pH strips-Knowing the pH of your water-based products is important-The higher the pH, the more bacteria. Plus, you want your products to be pH balanced as to not cause an in balance in your skin!
Thermometers-I use thermometers to monitor my water and oil mixtures when making a cream. When it is time to mix your mixtures together, you want to make sure the temps of both mixtures are similar to each other or they won’t properly mix. For added convenience and precision I have two thermometers, one for each mixture. It makes it so much easier and at $10 a pop, it’s not too costly.
Essential Oils:
Essential Oils can be what really boosts the results of your products. Essential oils can be daunting because there are so many of them and there are lots of opinions out there! Go HERE for my post on essential oils. I have 5 essential oils I recommend when using e.o’s in skin care.
- Lavender Essential Oil-I add Lavender to everything-not only does it smell incredible, it has anti inflammatory properties and is very calming,healing and nourishing. It is a universal oil, meaning every skin type can use it and benefit. It’s antibacterial and anti fungal qualities help to keep your products free from the yuckies!
- Geranium Essential Oil-Probably my favorite essential oil for skin, it helps even skin tone and increases circulation.
- Frankincense Essential Oil-works perfect in anti aging recipes. It firms, evens and nourishes. Plus, it’s so gentle. Perfect for every skin type.
- Peppermint Essential Oil-talk about a skin wake up call!! It helps brighten dull skin.
- Tea Tree Essential Oil-amazing for oilier skin types, it kills bacteria as well as prescription drugs but minus the side effects. I use it in my Skin Clearing Serum and as a spot treatment!
Not only do essential oils work hard to make your skin beautiful, most of them are also antibacterial and anti fungal. This is amazing prolonging the shelf life of your creation because the oils can help keep your product free from bacterial and fungus.
Salves/lip balms:
The more beeswax you use, the harder your salve/balm will be.
>>>For example, I like a medium-soft consistency with my lip balms and remedies like vapor rub and neosporin so I use 1/2 cup of oils/butters to 2 TBSP. of beeswax.
Lotions:
The more emulsifying wax you use, the thicker your cream will be.
>>>For the body-I use 2 heaping TBSP of wax to 6 TBSP. of oils/butters.
>>>For the face, I use 1 heaping TBSP. of wax to 6 TBSP. of oils/butters.
>>I always keep it simple and use 1 cup of water and 1/2 tsp. of neodefend to every cream. It’s easy to remember and it works.
Preservatives:
Many DIYers insist that using a preservative is a must anytime you are creating anything that contains water. Water grows bacteria and fungus period. Mix it with other stuff or let a cup of water set out for a prolonged amount of time and you’ll have bacteria growth. The problem with using a preservative is that it is HARD to find one that isn’t hazardous to your health. In fact, probably the most well know toxic ingredient that many skin care products use are parabens. Parabens are preservatives!
There are a few natural alternatives that will help prolong your shelf life, but technically, they are not preservatives.
- Grapesfruit Seed Extract
- Vitamin E
- Essential Oils
- Citric Acid
I pay a lot of attention to ingredient labels. I am obsessed with the skin care line, Eminence. I trust that what they are using is above board and safe. They use a combo. of preservatives, sodium benzoate and potassium sorbate. These preservatives are pretty gentle and only work when the pH of the products is around 3-6. I did not choose these preservatives for my products only because I wanted something very easy to work with. Having to add 2 different preservatives to my creams to get full protection and then having to figure out the correct percentage was to iffy!
NeoDefend is my preservative of choice in my products. It is considered certified organic and non-gmo. It is antioxidant and very gentle to the skin. Those of you weary of using a preservative must remember that it only makes up .75-1% of your product. You can read more about and purchase NeoDefend HERE.
My opinion is that I would rather add a preservative that I have researched and deemed safe, then slather loads of bacteria on my skin. That would defeat the whole purpose of DIY Skin Care.
Remember-Products that don’t contain water don’t need a preservative. Salves and balms are the way to go if you’d like to avoid using a preservative and not have to worry about bacteria and fungus!
A Few Important Points….
- Always wash your hands before starting a recipe-DIY skin care is just like food-you don’t want to contaminate it.
- Never turn your stove above medium heat-Always use the minimum amount of heat to keep your oils potent.
- Salves and serums are much easier to make then lotions. The only point in making lotions is because the water acts as a “vehicle” for the oils to penetrate the skin quickly.
- I buy most of my bottles and jars HERE. Always shoot for glass containers. They are nicer and healthier. Essential oils really don’t like plastic!
- Always try to add your essential oils in at the very end. Heat renders them ineffective. Sometimes with salves/balms I will let them cool completely, add essential oils, then mix the salve/balm with a spoon. It gives your salves/balms a creamy consistency.
- Remember-if you can cook, you can make skin care. Let me revise that-because I’m not a great cook-if you can follow a recipe, you can make skin care.
When you are questioning the quality of DIY skin care, remember that most skin care companies are money making machines. They use fillers like water and mineral oil to make their products more profitable for themselves. Fragrances and parabens are detrimental to your health when you are using a plethora of products daily. Using organic carrier oils and high quality essential oils gives you amazingly healthy and effective products better than most “gimmicks” you can get at the cosmetic counter.
Making your own skin care is one way you can take charge of your own body. Don’t rely on doctors to tell you what you should be doing-The reality is, this is your body-no one else’s. Our bodies were made to thrive on pure, natural food and a clean non-toxic environment. We live in a time where cancer rates are higher then they have ever been-when will we stop and ask why? I urge women to stop putting money in the skin care industry’s pockets, they do not have your best interest in mind. You are in charge of your own body, inside and out.
For Skin Care recipes go HERE.
For Make Up recipes go HERE.
For Momma & Baby recipes go HERE.
Jump in there and make something-it’s so fun and if you screw up, WHO CARES. Trash it and get on with another recipe-I have trashed my fair share of “experiments”. You could say, it’s the only way I’ve learned what I know.
xx, Jenni
[optin-form]
PIN IT!!!